Sunday, 26 April 2015

Textile Bag KEANE Makeover

One of my favourite music bands is called Keane and I have loved their music for eight years. I have been to two of their conserts here in Sweden and each time I have bought some merchandise to have a memory of the consert. The Perfect Symmetry World Tour back in 2008 I bought this textile bag. My mother sew a lining in it because it was very thin and for years I have used this bag to carry my lunch box for work and my knitting equipment.

Here is the final result of the makeover! :)

As you can see the original bag was quite damaged so I decided to give it a little makeover.

 
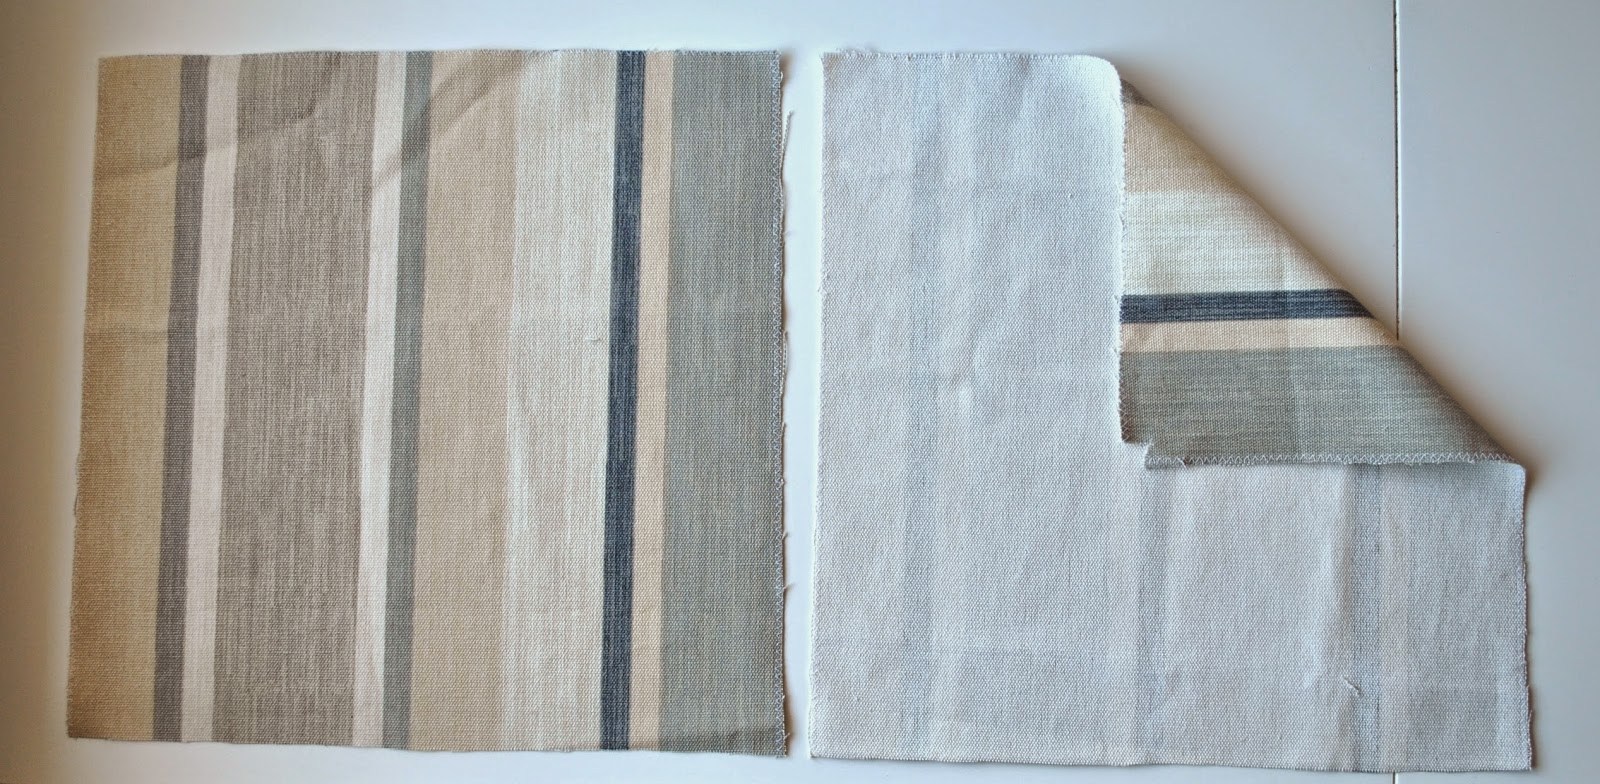
I cut out the print from the original bag, washed it and sew all around the edges.

 
The fabric I used is a Laura Ashley fabric that is very thick, so thick that you can use it for upholstery. I am sorry I didn't find the exact fabric on the internet to show you, but if you like the style of it you can check out Laura Ashley homepage and browse through their collection of fabrics :)

I pinned the edges of the printed square and sew it on one of the Laura Ashley fabric squares.


Saturday, 18 April 2015

Drawing Meg Ryan

One of my favourite movies is "When Harry met Sally" starring Meg Ryan and Billy Crystal from 1989. I can't remember how many times I have seen that movie, probably fifteen times.
Meg Ryan's character Sally Albright is a lovable person and I wanted to make a drawing of her. The picture is taken right in the beginning of the movie when Sally is sixteen years old, waiting in her car for Billy Crystal's character Harry Burns to stop making out with his girlfriend so they can start their journey from Chicago to New York.


The technique I use is lead pencils with the softness between  3B and 5B. I also used a pencil with pin to get really sharp details around the eyes and in the hair. The paper is sketching paper.


There are some details I couldn't point my finger at that made the drawing not entirely looking like the original. I think I should have used the darker pencils like 5B and 6B much more to get a "wow-effect". However, I think it looks quite good when I am comparing it to the original picture.


Saturday, 11 April 2015

Vanilla Cupcakes with Blueberry Cream Cheese Frosting

When my husband and I had our birthday party my mother in law gave us a new kitchen machine - a cupcake maker! I didn't even knew they existed! My first thought was that this machine was one of all new inventions that would be great for two tries and then one would discover that the result gets better in the oven. Well, I was wrong, the result is very good! I will definately use it many times in the future :) The concept of this machine is to be able to make cupcakes easy and fast without oven and without all the oven plates and baking cups in paper or silicone. Well I used silicon cups anyway :)

The cupcake maker we got was bought at the store Clas Ohlson, a large retail chain in Sweden. The store has a English homepage and a Swedish homepage. The cupcake maker you find with the English link doesn't look exactly the same like mine but I am sure it is basically the same machine.

I started from a recipe from a little book called "Cupcakes" by Corinne Jausserand (but I made a few changes on the way). Together with this little book you also get 16 small silicone cups that you can use again and again. I use them when I bake and they fit very well in the cupcake maker :)


Vanilla Cupcakes with Blueberry Cream Cheese Frosting

Vanilla Cupcakes
1 3/4 deciliter flour
1 milliliter salt
1/2 teaspoon bicarbonate
1 deciliter sugar
100 grams room temperatured butter
2 teaspoons vanilla sugar
2 eggs

Put the oven on 175 Celsius (I turn on the cupcake maker and wait until the green indicator lamp light on the top goes out)
Mix flour, salt and bicarbonate into bowl number 1 and set it aside for now.
Put the sugar into bowl number 2 and add the butter in pieces.
Add the vanilla sugar into bowl number 2 and whip the butter, sugar and vanilla sugar with a electric mixer.
Crack the first egg into bowl number 2, whip, add the second egg and whip again until the it is all homogeneous.
Use a fine mech strainer to get the flourmix from bowl 1 very fine and add the flourmix to bowl number 2 while you are whipping with the electric mixer.
Whip the mixture in about 2-3 minutes until it is very smooth and fluffy.
Fill the cupcake silicone cups with the mixture using a spoon. Fill upp about 2/3 of the cups.
In an ordinary oven you let the cupcakes bake for about 15-20 minutes (depending on the size of the cupcakes), however if you use a cupcake maker like me the time is about 10 -11 minutes.
When the cupcakes are ready you let them rest and cool on a plate.

Blueberry Cream Cheese Frosting
100 grams of Cream Cheese (Philadelphia is one option)
1 deciliter icing sugar
2 tablespoons of blueberries (fresh or frozen)

Mix the blueberries and the sugar in a saucepan. Let the mixture simmer and crush the berries with a spoon. Let the mixture cool.
Stirr the cream cheese with a fork to get it smooth. 
Use a fine mesh strainer to get the icing sugar very fine and add it to the cream cheese. Stirr well.
Add the cooled blueberry mixture little by little into the cream cheese/icing sugar mix to get a 
Spread the frosting on your cupcakes with a knife or pipe it out as a swirl (but remember to have a big opening so the blueberry pieces in the frosting don't get stuck).




Tuesday, 7 April 2015

Knitted Soft Toy Moose

Knitted animals and soft toys - who doesn't love them!? I have thought of making soft animals many times before but I have never really giving it a fair try. This time I decided to really make an effort because these kind of handicrafts are very lovable and you can really use your imagination to create cute things. I love to create from scratch and build things with my own imagination and design and I think this could be a new fun hobby!

Today I will show you my first soft animal friend :) He is a Swedish moose and his name is Sven. Sven is one of a kind because he has red pants (and I can tell you it is not very likely to find a moose with pants in the Swedish woods these days). Ever since the day he got the pants he loved them and whatever others may say or think about it, he will never throw them away!
As you can see he is quite a lively moose making silly moves every time I tried to take a picture of him...!

I wrote the pattern myself as I went along and the total time from making the first calculations until he was finished was about 10 days.
It was Easter holiday this past weekend and I had a lot of time knitting while my husband played videogames and I watched sitting beside him. At the moment he is playing Bloodborne, which is a new game related to the Demon's Souls and Dark Souls games. I really like to follow the stories these games are hiding - it is almost like a movie sometimes. So there I sit in our sofa having one eye on my knitting project and one eye on the tv-screen :) 


The horns were apparently excellent support when standing on the head...


Perhaps standing a bit too close to the camera...


Sunday, 29 March 2015

Easter Decoration - Easter Witch for the Window

Next weekend it is Easter and for this post I made a fun Easter Witch decoration to hang in my kitchen window :)
In Sweden some people celebrate Easter the Christian way in remembrance of Jesus Christ's passion, death and resurrection. However, in recent times, the Passover for the common man have lost much of its religious content and has become a secular family celebration were old folklore, ancient Nordic traditions and Christian traditions are all mixed.

"Easter witch" is according to old Swedish folklore, witches who traditionally fly on brooms to BlĂ„kulla, the Brocken, on the night before Maundy Thursday to feast and then return on Easter Sunday. According to Wikipedia, ever since the early 1800s it is common in Sweden that children dress up as Easter witches, knocking on the doors in the neighborhood wishing everyone "Happy Easter" while giving away homemade cards and drawings. In exchange they get some candy or pennies. 

In Sweden we also put birch twigs in a vase and decorate it with colorful feathers (the twigs are initially connected to Jesus' entry into Jerusalem, and the palm leaves sprinkled in front of him on the ground).

        
When I was a little girl my mother made a little Easter Witch like this and I remember it very well always wanted to make one for myself one day. Well this was the day - or days - because it took me about three days to make it from start to finish. 

I will not make a tutorial for this doll but I will give you all the parts you need to make it. You will need:
  • Pantihose for the head
  • Cotton wool for the head filling (my doll's head diameter is approx. 5cm)
  • Needles
  • Yarn for the hair (Put four of your fingers together and wire the yarn around them. Sew the upper loops to the head. Cut the lower loops to get single threads. 
  • Sewing thread for eyes, mouth and freckles
  • Fabric for the dress (the fabric I used you can find at Fabric-World or in Sweden at Ohlssons Tyger)
  • Fabric for the headscarf (a triangle) and the apron
  • Fabric for the body and arms (my doll's body is approx. 10cm *5cm)
  • A branch (about 20-30 cm) for the broom handle
  • Small twigs for the broom bristles cut in 7 cm length 


Saturday, 21 March 2015

Green Short Sleeve Blouse

I found a lovely fabric last week, a green one with tulips called "Tender Tulips" from Soft Cactus. It is a really happy pattern that makes me think of spring and summer and because it is so nice I thought long and hard what kind of pattern I would use to make the best out of it. I thought of a skirt at first but then it might be nice with a blouse... Finally I decided to make a blouse and I found a pretty blouse pattern in Burda Style 5/2014. The model is quite straight in the waist area and it has some wrinkles on both right and left chest and on the back. It is a cute model and I will definitely use this pattern again! :)
As usual I started to follow the pattern instructions step by step but when I got to the neckline I had trouble understanding the instructions. I read it over and over again (maybe I had a bad day or maybe I was just tired) so I gave up and skipped the instructions and did my own thing haha! I think it turned up pretty well and I actually think it is my best work of sewing I have ever made! Hurray!


Saturday, 14 March 2015

Lemon Cake with Raspberry/Blueberry Jam and Vanilla Custard

HAPPY BIRTHDAY ANGELICA'S HANDICRAFTS - ONE YEAR HAS PAST!

Oh, I can't believe that the blog turns one year this weekend! It has been a wonderful year and I have blogged about many new projects. This year has made me realized that I actually can finish things and not just start them! As you probably have experienced this year I try to do different projects from week to week so you readers get variation. I hope you have enjoyed the past year's posts and keep coming back and always feel free to give me a comment :) As a birthday present for the blog I have started a Instagram profile today named angelicashandicrafts where I will start posting pictures of projects and other things regarding the blog - I hope we meet there!

For this week I made a birthday cake for my blog, I wanted to make it in many layers and I wanted to make all the parts by myself and not use any semi-manufactures.
The cake contains three layers of filling; two layers of homemade blueberry/raspberry jam and one layer of homemade vanilla custard.


Lemon Cake with Blueberry/Raspberry Jam and Vanilla Custard

Garnish
5 dl whipped cream
Red food coloring
Sprinkles

Homemade bluberry/raspberry jam
250 grams frozen raspberries
250 grams frozen blueberries
1 deciliter sugar
Sheet of gelatin (optional)

1. Let the berries thaw and become soft in a sauce pan on medium heat while stirring. 
2. When the berries are soft you can use a spoon or a masher to crush the berries.
3. Add sugar and let the jam simmer for about 15 minutes.
4. If you want you can add gelatin sheet, follow the instuctions on the package.
5. Put the jam into the fridge to cool completely.

Vanilla Custard
2 deciliter milk
2 tablespoons sugar
2 tablespoons corn starch
2 egg yolks
2 teaspoons vanilla sugar

1. Put all the ingrediets, except for the vanilla sugar, into a sauce pan.
2. Whisk until you get a smooth batter.
3. Heat on low to medium heat while you continue to whisk constantly until the custard is firm and fine in texture. The custarn must not boil!
4. Stir gentley and add the vanilla sugar.
5. Let the custard cool and keep it in he fridge until making the cake.

Lemon Cake (make TWO of this!)
3 eggs
2 deciliter sugar
1 deciliter wheat flour
60 grams potato flour
2 teaspoons baking powder
Juice and grated lemon zest of 1/2 lemon

1. Put the oven on 175 Celsius.
2. Grease and bread a spring form diameter 20 cm.
3. Whisk the eggs and sugar until the batter is light and white.
4. Mix flour, potatoflour and baking powder and then stirr it into the egg batter.
5. Add the lemon juce and the grated lemon zest into the batter. 
6. Pour the batter into the spring form and bake in the loer part of the oven for about 40 minutes (but use a test stick to see when it is dry.
7. Let the cake cool in the form and then take it out and let it rest on a grid.

Assembly the cake
1. If the two lemon cakes are rounded on top, even out with a knife. Cut both cakes in two so you get a total of four cake layers.
2. Put the first cake layer on a cake stad or a plate and spread half of the blueberry/raspberry jam on it.
3. Add the next cake layer and spread all of the vanilla custard on it.
4. Add the next cake layer and add the rest of the blueberry/raspberry jam on it.
5. Add the final cake layer.
6. Whip 5 the cream and add a few drops of red food coloring to make it pink.
7. Use a spatula to spread a layer of pink cream all over the cake.
8. Use a piping bag to make decorations on top and cover the cake with sprinkles!

Tip: I made the jam and the vanilla custard the day before I made the cake - good to divide the various stages and not do everything at once!