Showing posts with label cake. Show all posts

Saturday, 23 January 2016

Chocolate Cake with Chocolate Icing and Coconut

This cake is very common on the Swedish "fika" table when we drink coffee or tea while we sometimes eat pastries or just a little biscuit. This cake is usually baked in a large oven pan with high edges (about 3-5 centimeters) and that is mentioned in the recipe below, but this time I tried using an ordinary baking pan with removable rim (diameter approximately 24 cm), which works equally great.

I admit that I am not a fan of coconut (not the texture nor the taste), however, this cake is the only cake with coconut that actually works fine with me :)


Chocolate Cake with Chocolate Icing and Coconut
150 grams of butter or margarine
2 eggs
3 deciliter sugar
2 teaspoons vanilla sugar
1 tablespoon cocoa
4 1/2 deciliter flour (wheat)
2 teaspoons baking powder
1 1/2 deciliter milk

Icing
75 grams of butter or margarine
1-2 tablespoons cold coffee
1 tablespoon cocoa
2 teaspoons vanilla sugar
3 1/2 dl icing sugar

Garnish
Coconut flakes

How to...
1. Put the oven for 175 degrees Celsius.
2. Melt the butter and let it cool down. 
3. Whisk the eggs and the sugar until it becomes a white and fluffy texure.
4. Mix the flour, vanilla sugar, baking powder and cocoa and add this mixture alternately with the melted butter into the egg mixture. 
5. Pour the batter into a greased oven pan (about 30*40 centimeters) covered in bread crumbles.
6. Bake in the lower part of the oven for about 15 minutes.
7. Let the cake cool.
8. Melt the butter for the icing into a sauce pan and then add the rest av the ingredients into the sauce pan while stirring.
9. Spread the icing on top of the cake and spread the coconut flakes over. Work fast because it will harden quite fast. 
10. Cut the cake in squares.


Sunday, 23 August 2015

Tosca Cake

One of my grandmother's classic recipes was the tosca cake, a soft spunge cake with a layer of caramelized almonds on top. I remember as a child I found the topping was the goodiest thing so I ate that first :)
I haven't baked this cake before, and I haven't eaten one since my grandmother made it maybe ten years ago, so I experienced a flashback when I took a bite of this :) A good flashback! The almond topping is the best! Try it, you won't be disappointed :)
Tosca Cake
100 grams or magarine or butter
2 eggs
1 1/2 dl sugar
2 dm flour
1 teaspoon baking powder
1/2 deciliter milk

Topping
100 grams of margarine or butter
1 deciliter sugar
2 tablespoons flour
2 tablespoons milk
100 grams chopped sweet almonds (peeled or unpeeled)

1. Put oven to 175 Celsius.
2. Grease and bread a round cake tin with removable rim, aproximately 24 cm in diameter.
3. Melt the margarine/butter and let it cool for a while.
3. Whisk sugar and eggs until the mix is light and fluffy.
4. Add the flour mixed with baking powder, the melted margarine/butter and the milk until you get a smooth fluffy batter.
5. Pour the batter into the cake tin and let the cake bake in the lower part of the oven for about 20 minutes.
6. While the cake is in the oven you can start preparing the topping.
7. Mix all the ingredients into a saucepan and let it warm slowly while you stire carefully.
8. When the mixture has started to thicken it is ready.
9. Spread the topping on the cake.
10. Let the cake bake approximately 15 minutes more in the middle of the oven until the color is nice on the topping.


Monday, 29 June 2015

Marbled Cake / Tiger Cake

Grrrr! Hello friends, this week I will show you a recipe for marbled cake, or as I have always called it, Tiger cake :) This classic cake is basically 1/3 chocolate batter and 2/3 vanilla flavoured batter, but you could of course use two other flavours if you want, I guess the variations can be unlimited :)


Marbled Cake / Tiger Cake Recipe
200 grams of butter or margarine
2 1/2 deciliter sugar
3 eggs
4 deciliter flour
1 teaspoon baking powder
1 deciliter milk

Flavours:
2 tablespoons cocoa powder
1 tablespon vanilla sugar (or 1/2-1 lemon zest)

Put oven to 175 Celsius.
Grease and bread a baking pan size about 1 1/2 liter.
Stirr the margarine and the sugar white and smooth and add one egg at the time while continuing stirring.
Mix flour and baking powder and add to the egg mixture along with the milk little by little to avoid lumbs.
Put 1/3 of the batter in a bowl and add the cocoa.
Flavour the rest of the batter with vanilla suger or lemon zest.
Pour half of the vanilla batter into the baking pan, and then pour the coca batter on top. Finally add the last of the vanilla batter on top of the cocoa batter.
Use a fork and draw it around through all the layers a few times so the layers mix into each other.
Bake in the lower part of the oven for about one hour.

Have a great week folks!


Saturday, 14 March 2015

Lemon Cake with Raspberry/Blueberry Jam and Vanilla Custard

HAPPY BIRTHDAY ANGELICA'S HANDICRAFTS - ONE YEAR HAS PAST!

Oh, I can't believe that the blog turns one year this weekend! It has been a wonderful year and I have blogged about many new projects. This year has made me realized that I actually can finish things and not just start them! As you probably have experienced this year I try to do different projects from week to week so you readers get variation. I hope you have enjoyed the past year's posts and keep coming back and always feel free to give me a comment :) As a birthday present for the blog I have started a Instagram profile today named angelicashandicrafts where I will start posting pictures of projects and other things regarding the blog - I hope we meet there!

For this week I made a birthday cake for my blog, I wanted to make it in many layers and I wanted to make all the parts by myself and not use any semi-manufactures.
The cake contains three layers of filling; two layers of homemade blueberry/raspberry jam and one layer of homemade vanilla custard.


Lemon Cake with Blueberry/Raspberry Jam and Vanilla Custard

Garnish
5 dl whipped cream
Red food coloring
Sprinkles

Homemade bluberry/raspberry jam
250 grams frozen raspberries
250 grams frozen blueberries
1 deciliter sugar
Sheet of gelatin (optional)

1. Let the berries thaw and become soft in a sauce pan on medium heat while stirring. 
2. When the berries are soft you can use a spoon or a masher to crush the berries.
3. Add sugar and let the jam simmer for about 15 minutes.
4. If you want you can add gelatin sheet, follow the instuctions on the package.
5. Put the jam into the fridge to cool completely.

Vanilla Custard
2 deciliter milk
2 tablespoons sugar
2 tablespoons corn starch
2 egg yolks
2 teaspoons vanilla sugar

1. Put all the ingrediets, except for the vanilla sugar, into a sauce pan.
2. Whisk until you get a smooth batter.
3. Heat on low to medium heat while you continue to whisk constantly until the custard is firm and fine in texture. The custarn must not boil!
4. Stir gentley and add the vanilla sugar.
5. Let the custard cool and keep it in he fridge until making the cake.

Lemon Cake (make TWO of this!)
3 eggs
2 deciliter sugar
1 deciliter wheat flour
60 grams potato flour
2 teaspoons baking powder
Juice and grated lemon zest of 1/2 lemon

1. Put the oven on 175 Celsius.
2. Grease and bread a spring form diameter 20 cm.
3. Whisk the eggs and sugar until the batter is light and white.
4. Mix flour, potatoflour and baking powder and then stirr it into the egg batter.
5. Add the lemon juce and the grated lemon zest into the batter. 
6. Pour the batter into the spring form and bake in the loer part of the oven for about 40 minutes (but use a test stick to see when it is dry.
7. Let the cake cool in the form and then take it out and let it rest on a grid.

Assembly the cake
1. If the two lemon cakes are rounded on top, even out with a knife. Cut both cakes in two so you get a total of four cake layers.
2. Put the first cake layer on a cake stad or a plate and spread half of the blueberry/raspberry jam on it.
3. Add the next cake layer and spread all of the vanilla custard on it.
4. Add the next cake layer and add the rest of the blueberry/raspberry jam on it.
5. Add the final cake layer.
6. Whip 5 the cream and add a few drops of red food coloring to make it pink.
7. Use a spatula to spread a layer of pink cream all over the cake.
8. Use a piping bag to make decorations on top and cover the cake with sprinkles!

Tip: I made the jam and the vanilla custard the day before I made the cake - good to divide the various stages and not do everything at once!


Saturday, 27 September 2014

Candy cake filled with strawberry jam, banana and vanilla cream

It was my birthday a week ago and my husband's birthday is next week so we did what we always do this time of  year. 1 birthday + 1 birthday = One cake and one birthday party! This year we made a candy cake with NonStop chocolate lentils and sweet jelly raspberrys. I really like how the chocolate lentils make the cake sparkle of colors!
Inside this cake of happiness we find three soft sponge cake bases holding up layers of thinly slices of banana, vanilla cream and strawberry jam.


Sponge cake bases
4 eggs
2 deciliter white sugar
1 deciliter flour
3/4 deciliter potato flour
1 1/2 teaspoon baking powder

Put the oven to 175 Celcius.
Grease and bread a baking pan approximately 26 centimeter in diameter.
Whip the eggs together with sugar until you get a white fluffy mixture.
Mix flour, baking powder and potato flour and pour the flourmixture into the egg/sugar mix. Be careful and be sure to turn the flour gently into the egg/sugar mixture. It is important that the fluffy texture is maintained.
Pour the finished batter into the bakinf pan and bake it in the lower part of the oven for about 40 minutes.
When the cake is baked you need to take it out of the baking pan and let it cool on a oven rack.
When the cake is room temperature you divide it with a knife into three layers.

 Topping
2 deciliter whipped cream to cover the sides and the top
Non Stop chocolate lentils
Sweet jelly raspberrys

Filling
2,5 deciliter vanilla cream you can whip
2 bananas
2 deciliter strawberry jam

See the little picture at the right.
The darker yellow parts represents the sponge cake layers.
The red area is only strawberry jam.
The light yellow area is whipped vanilla cream
(approx 1 cm thick) + a layer of very thin slices banana.


Saturday, 16 August 2014

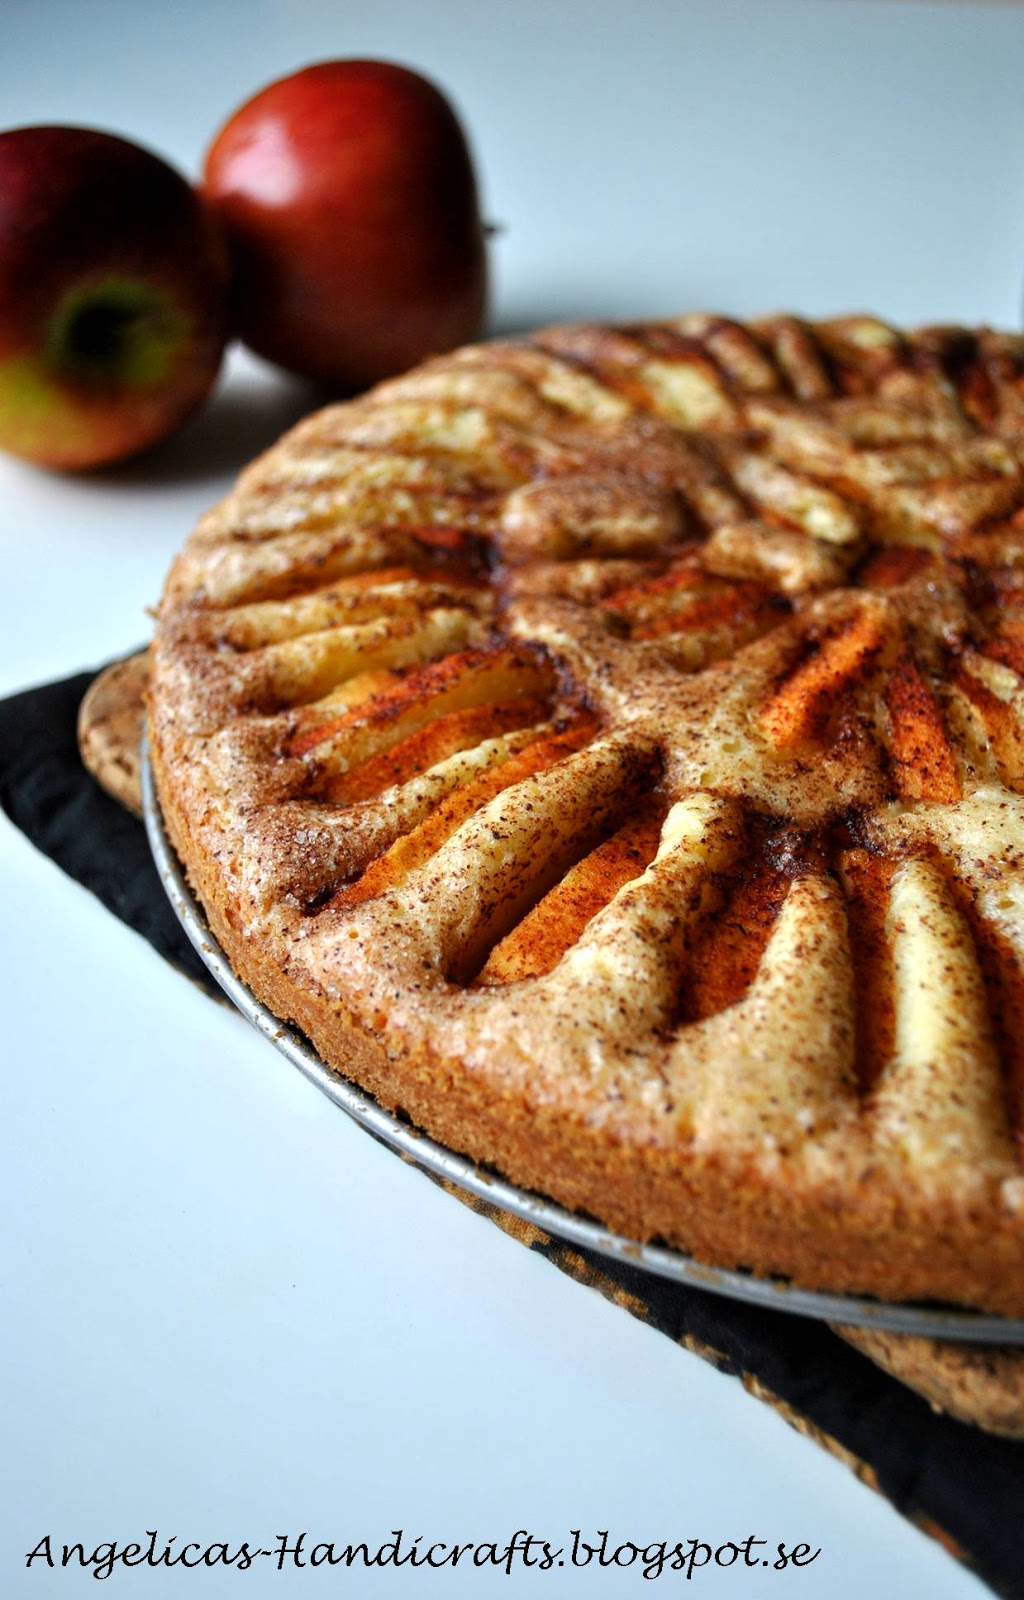
Classic Apple Sponge Cake with Cinnamon

Sometimes I get a huge need to bake, often I don't know what I want to bake - just something - and I end up browsing through my baking books to find out what it will be. A scenario like this took place yesterday and the lucky winner was.... Apple sponge cake!
When I found the recepie in the book I realized that I had forgotten about this kind of fruit cake and when I took the first bite and tasted the sweet/sour apple pieces together with the sponge cake and cinnamon I realized how much I missed it. Apple sponge cake is far too underestimated and I swore to myself that I will bake it again very soon. And then again and agian and again....
Oh and remember, you can replace the apples with whatever you like such as pears, rhubarb, blueberries and raspberries! 


Apple Sponge Cake with Cinnamon

Oven temperature: 175 Celsius

125 grams of margarine or butter
1 1/2 dl white sugar
2 eggs
2 1/2 dl flour
1/2 teaspoon baking powder
2 tablespoons milk

Garnish
3-4 apples
1-2 tablespoons white sugar
1 teaspoon cinnamon

How to...
  1. Grease and cover the inside of a baking pan (with removable rim), about 24 cm in diameter.
  2. Melt the margarine/butter and let it cool down.
  3. Use a baking assistant machine or stir by hand the melted margarine/butter with the sugar until it gets light yellow and light in the consistency. 
  4. Pour one egg at the time into the sugar mixture.
  5. Use a spoon and evenly distribute the baking powder in the flour and then add the flour into the sugar mixture little by little. 
  6. Add milk into the batter and stir until it gets smooth and even. 
  7. Pour the batter into the baking pan and use a spoon to even the surface.
  8. Peel the apples and cut them into thin wedges.
  9. Insert the apple wedges into the batter close togheter.
  10. Spread white sugar mixed with cinnamon over the cake.
  11. Bake the cake in the lower part of the oven for about 30-40 minutes. 


Saturday, 26 April 2014

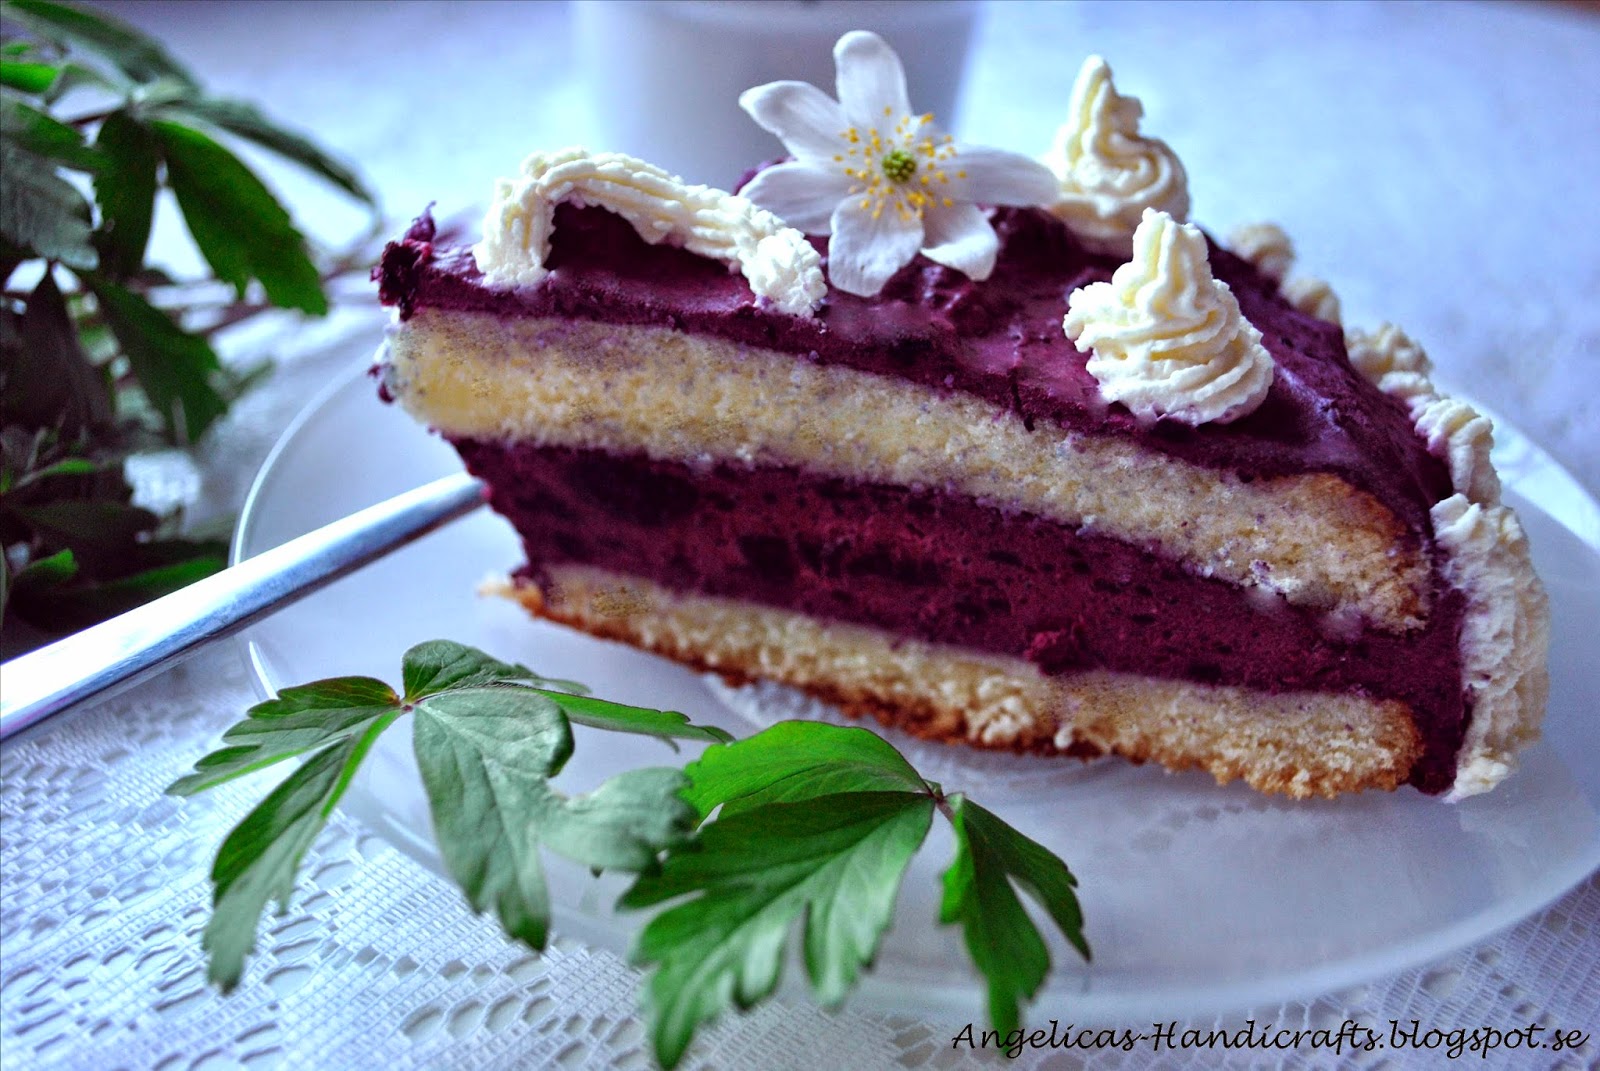
Blueberry cake

My father turned 65 years old last week and last Sunday my husband and I celebrated his birthday by making a blueberry cake!
This cake tastes good when it's freshly baked as well as after a couple of days in the fridge. However, if you plan to eat the cake after a couple of days you should skip the cream garnish and whip fresh cream to have in a bowl on the side to avoid two days old "refrigerator-tasting" cream which is not very nice...!


Blueberry cake

Cake layers
4 eggs
2 dl sugar
1 dl flour
¾ dl potato flour
1 ½ tsk (teaspoon) baking powder
½ dl breadcrumbs

Filling
500 g frozen blueberries
1 dl sugar
2 tsk (teaspoon) vanilla sugar
7 gelatin sheets
200 grams cream cheese
4 dl whipping cream

Garnish
2 dl whipping cream for the garnation

Note:
You can bake the cake layers one day before it is time to serve. It stays soft if you firmly package it in plastic foil and store it in room temperature.


Cake layers
1.                   Grease a baking pan (ca 24 cm diameter) with detachable edge and sprinkle it with breadcrumbs.
2.                   Whip eggs and sugar porous.
3.                   Mix flour, potato flour and baking powder and stir it into the sugar/egg batter.
4.                   Pour the batter in the baking pan.
Bake the cake in the lower part of the oven in approximately 40 minutes.
5.                   Let the cake cool down to room temperature and cut it into two layers.

Blueberry filling
6.                   Put the gelatine sheets in cold water to make them soft.
7.                   Mix the frozen blueberries with sugar and vanilla sugar in a sauce pan. Let the mixture simmer on medium heat until the berries are crushed.
8.                   Silane the mixture and keep the juice. Melt the gelatine sheets in the juice while stirring. Let it cool down to room temperature.
9.                   Whip the cream so it becomes very stiff.
10.                 Mix the blueberry mixture with the cream cheese and then gently turn the whipped cream into the mixture.

Put together the cake
11.                 Add a cake layer on a suitable plate. Use a spatula to spread ¾ of the blueberry filling on the layer.
12.                 Add the second cake layer on the filling. Use a spatula to spread the rest of the blueberry filling on the layer and all around the edges of the cake.
13.                 Whip the cream and use a piping bag to make decorations on top and all around the edges of the cake.
                     
                      Serve!


Note:

Because the blueberry filling has a rich taste, don’t be stingy with the amount of cream as garnish 
(or set out a bowl of whipped cream for the guests so they can take as much as they want). The cream gives the cake a lighter taste, a least in my opinion :)