Saturday, 26 April 2014

Blueberry cake

My father turned 65 years old last week and last Sunday my husband and I celebrated his birthday by making a blueberry cake!
This cake tastes good when it's freshly baked as well as after a couple of days in the fridge. However, if you plan to eat the cake after a couple of days you should skip the cream garnish and whip fresh cream to have in a bowl on the side to avoid two days old "refrigerator-tasting" cream which is not very nice...!
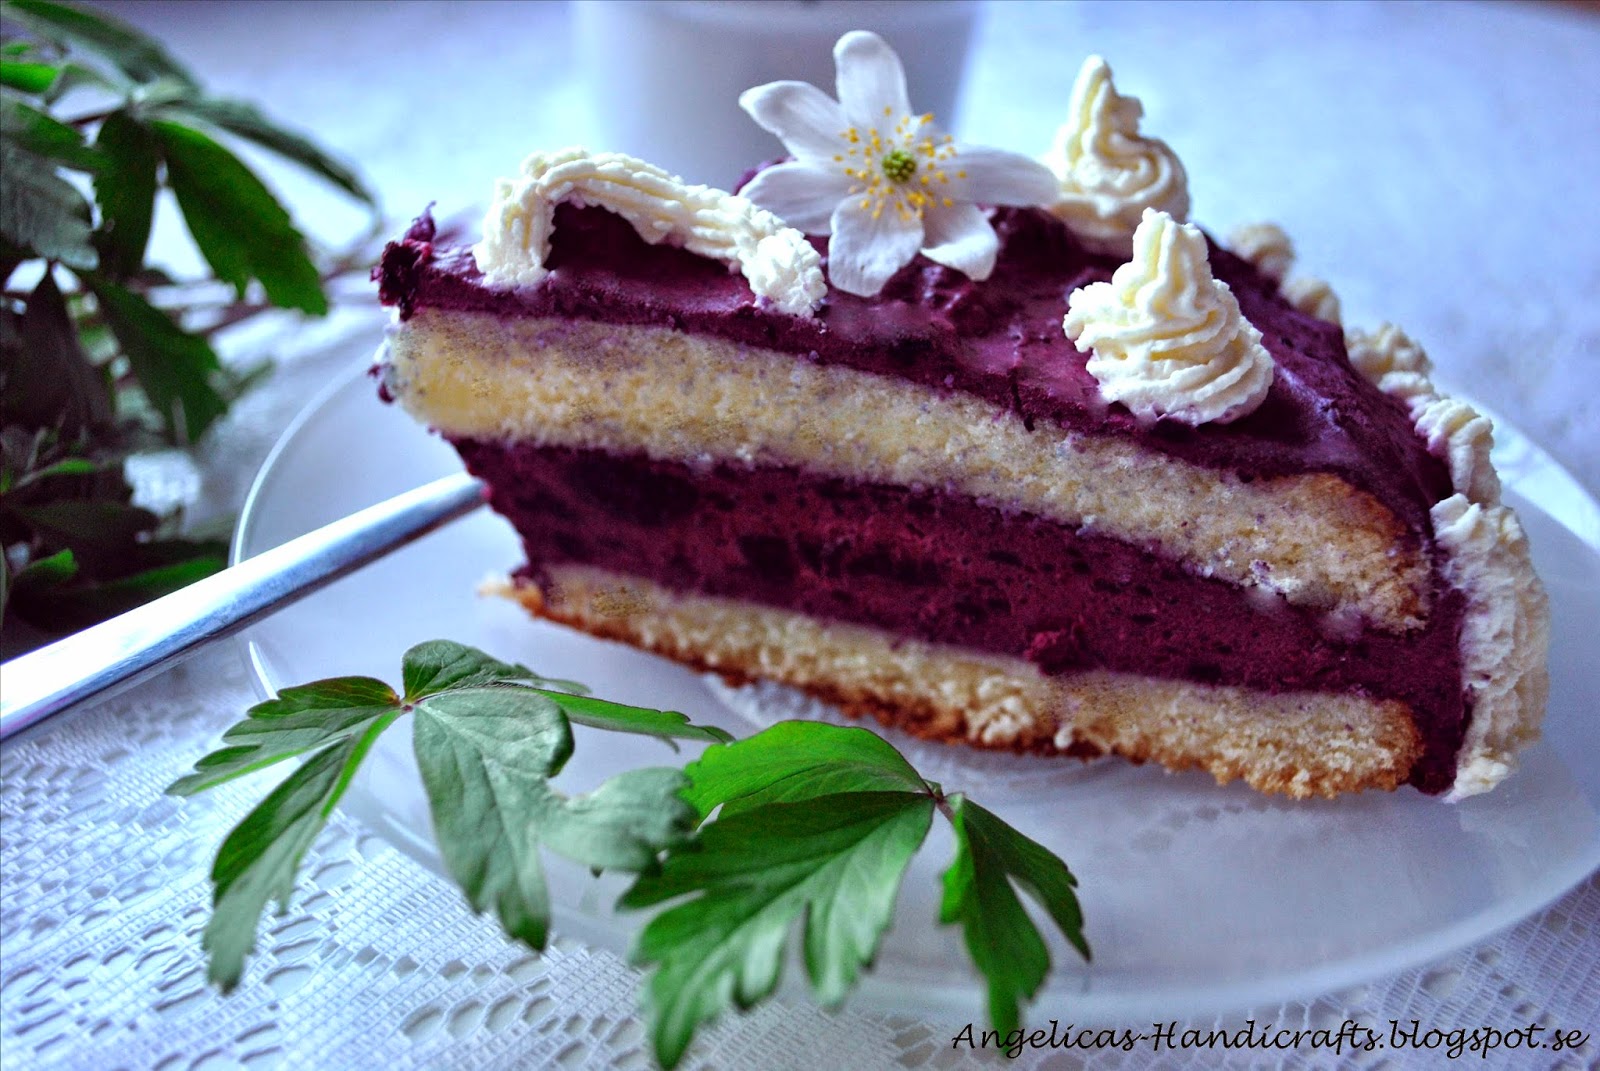


Blueberry cake

Cake layers
4 eggs
2 dl sugar
1 dl flour
¾ dl potato flour
1 ½ tsk (teaspoon) baking powder
½ dl breadcrumbs

Filling
500 g frozen blueberries
1 dl sugar
2 tsk (teaspoon) vanilla sugar
7 gelatin sheets
200 grams cream cheese
4 dl whipping cream

Garnish
2 dl whipping cream for the garnation

Note:
You can bake the cake layers one day before it is time to serve. It stays soft if you firmly package it in plastic foil and store it in room temperature.


Cake layers
1.                   Grease a baking pan (ca 24 cm diameter) with detachable edge and sprinkle it with breadcrumbs.
2.                   Whip eggs and sugar porous.
3.                   Mix flour, potato flour and baking powder and stir it into the sugar/egg batter.
4.                   Pour the batter in the baking pan.
Bake the cake in the lower part of the oven in approximately 40 minutes.
5.                   Let the cake cool down to room temperature and cut it into two layers.

Blueberry filling
6.                   Put the gelatine sheets in cold water to make them soft.
7.                   Mix the frozen blueberries with sugar and vanilla sugar in a sauce pan. Let the mixture simmer on medium heat until the berries are crushed.
8.                   Silane the mixture and keep the juice. Melt the gelatine sheets in the juice while stirring. Let it cool down to room temperature.
9.                   Whip the cream so it becomes very stiff.
10.                 Mix the blueberry mixture with the cream cheese and then gently turn the whipped cream into the mixture.

Put together the cake
11.                 Add a cake layer on a suitable plate. Use a spatula to spread ¾ of the blueberry filling on the layer.
12.                 Add the second cake layer on the filling. Use a spatula to spread the rest of the blueberry filling on the layer and all around the edges of the cake.
13.                 Whip the cream and use a piping bag to make decorations on top and all around the edges of the cake.
                     
                      Serve!


Note:

Because the blueberry filling has a rich taste, don’t be stingy with the amount of cream as garnish 
(or set out a bowl of whipped cream for the guests so they can take as much as they want). The cream gives the cake a lighter taste, a least in my opinion :)   


Sunday, 20 April 2014

Easter Lunch and Folding Bunny Napkins

Happy Easter everyone!

On Easter Saturday me and my husband invited our mothers to Easter lunch. The classical Swedish dishes were meatballs, little sausages, hard boiled eggs with caviar, mustard herring, pickled herring and of course potato gratin with anchovies - also commonly referred as "Jansson's temptation" here in Sweden.


These lovely bunny napkins made the table setting very cute and they were very appreciated among our guests :)  See below for a tutorial so you can make them for yourself next Easter - or perhaps any other day when you feel like a bunny would cheer up your mood :) Enjoy!


Saturday, 12 April 2014

Cutting out a new pattern

It has been a very nice sunny day today and after shopping food for the upcoming week and some cleaning in the apartment I sat down for some hours to start measuring and cutting out all the pieces of the pattern for my next sewing project - a short jeans jacket in... PINK of course! :)
In the last minute I decided to change my mind regarding the length. The original plan was to make a short coat but today I realized that a short jacket is much more useful for me.  


The scarf knitted in blackberry technique I started working on last week is growing, and next week I hope to reach halfway! :)

Also, yesterday a parcel finally arrived at my doorstep containing an new and exciting accessory I will use in my future photos :) When the scarf is finished this new accessory will be revealed here on the blog!


Saturday, 5 April 2014

Shorts Around The World

Other than going to the hairdresser this morning to dye my hair in dark red highlights I have also continued on a new knitting project I started on yesterday :) It will be a 1,5 m long scarf in blackberry technique. I really do love the way blackberry knitting both looks and feels. I think it looks luxurious and at the same time it's very cozy - perfect for a nice autumn scarf! In some weeks I hope to put it here on the blog for you to see :)
In the meantime, here is a little sneak peek how it looks right now. Black&White photo since the color is yet a surprise ;)


The summer is on it's way and soon it will be time for these World Map Shorts to enjoy the sunshine outside!
I bought this fabric in a Åhléns store about two years ago, before the "real" fabric store Ohlssons Tyger opened here in Jönköping. I am really happy to have Ohssons Tyger nearby since Åhléns has a very small selection of fabrics suitable for clothing. Visit their official homepage here
They have a wide selection of fabrics. Enjoy!

The pattern for these shorts is the pants 2A from Burda Easy V/S 2012 (see below). The only thing I changed was to shorten the legs and fold them right above my knees.


Saturday, 29 March 2014

Green and Yellow Baby Cardigan

Yesterday I finished this baby cardigan I have been working on since mid-December :) You can find the free pattern here on www.garnstudio.com. Unfortunately you can only choose between, Swedish, Norwegian and Danish but I guess you can Google-translate the most of it into English - always worth a try!

I think the way you knit this cardigan is easy and fast because you knit in vertical direction all the way around, and instead of counting rows you just measure how far you have knitted. I will certainly knit with this cardigan pattern again - I think it's a keeper!

My first intention was to make the cardigan solid color green but when I realized I didn't have enough green yarn I created the yellow pattern at right front - I think the result of my improvisation turned out well.
The buttons are shaped like little yellow flowers, I bought them in a little PFAFF shop in Jönköping. I love these buttons - so cute! :)


Saturday, 22 March 2014

Knitted mittens and cap


About three years ago I made these mittens and cap as a first Christmas gift for my boyfriend, now husband. It was the first knitting project I had ever done and I remember knitting on the bus every morning on my way to work to get it finished in time. My mother, who has knitted and sewn ever since I can remember, helped me understand the knitting pattern and I think it took about two months to finish both mittens and cap. I really don't know what type of yarn it is (it is actually three different yarns I found in my mothers basket full of mixed residual yarns). Later on I sew a fleece lining which was very appreciated during the really cold days.

I am glad to say that my husband has used them very much - I actually had to mend (sadly it was impossible to make it nice and neat because of the damage) two big holes on each thumb just a week ago, but now he can use them again :) or perhaps they have to wait in the drawer until next winter since the spring is coming with big steps...!


Saturday, 15 March 2014

Light Grey/White stripes shorts

Today it's Saturday and I try to relax and charge my batteries for next week's work!

Below is one of the first sewing projects I ever made!
Shorts (yes, slightly too wide for my skinny legs haha...) in 100% cotton, light grey and white stripes. The pattern is from Burda Easy V/S 2012 magazine. The original pattern has a zip at left hip but since I didn't have the opportunity to buy a zipper at the time so I sew two straps so I could tie together the waistband. Well, the result was not very pretty but it was an okay solution for a total beginner... :) I really like the folds at front and I think I got good results for the back pockets.